|
Replay Video Capture records videos similar to a camera pointed to
your screen or a portion of your screen. It also records audio from your speakers
or from an external audio source. No video or audio data is downloaded from
the Internet.
The user interface
(main screen window) can be rescaled. If you're using a 13" 1920x1080
monitor you may want to use a larger image. Click the Help button (question
mark) on the main screen then click ‘Replay
Video Capture screen size’.
Replay Video Capture
provides two recording modes: a conventional Screen Capture mode and an advanced recording mode which
maximizes your video capture performance , the Background mode. This Quick Guide refers mostly to version 8 or higher.
Replay Video Capture
is a "plug and play" program and after the installation it should
be ready for recording.
In general, use the
guides below in order to get the best quality recordings:
·
try to use the Background
mode (Windows 7, 8, 10) or the Windows
Basic (Aero disabled) mode (Windows 7)
·
select the highest frame rate your system supports (see below)
·
select the highest video bitrate
Recording guides
Note
that the quality of recorded videos depends primarily on the frame rate
(fps) that
your system can sustain and the selected video bitrate (kbps). A high frame
rate makes a smooth motion video, a high bitrate
makes a clear, sharp video. While recording, Replay Video Capture displays
the message "Frame Rate too
high" if the selected frame rate is higher than the rate the
system can sustain. If this message appears repeatedly you may need to
lower the frame rate from Settings and/or the size of the recorded video.
The table below
shows some tested frame rates for different video sizes and CPU performance
when either Background mode or Windows Basic mode (Aero disabled) are used.
|
Video Format
|
Video Size
|
CPU
|
fps
|
Usage
|
|
MPEG-2
|
1920x1080
|
i5/i7 Quad 2.4 GHz
|
30p
|
high quality movies, HD videos, games, DVD video
format
|
|
|
1280x720
|
i5/i7 Quad 2.4 GHz
|
30p to 60p
|
|
|
lower
|
Any 2 or 4 cores
|
25p to 60p
|
|
Windows Media
|
1920x1080
|
i5/i7 Quad 2.4 GHz
|
20
|
movies, webinars, web, documents, any video or audio
|
|
|
1280x720
|
i5/i7 Quad 2.4 GHz
|
30 to 60
|
|
|
lower
|
Any 2 or 4 cores
|
25 to 100
|
|
Windows Media Screen
|
Up to 1920x1080
|
any
|
10
|
slide shows, documents, slow moving webinars
|
·
MPEG-2 uses progressive scan
in all cases (30p - progressive is equivalent to 60i - interlaced. Most HD
movies are broadcasted at 60i)
·
Windows Media recorded files
are smaller then MPEG-2 however CPU loading is higher
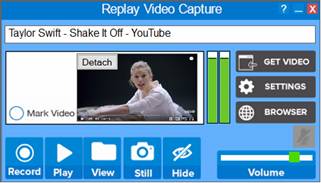
Version 8.4 and higher
·
Replay Video Capture adds a real time preview of the marked video
area (as shown in the above picture). Click the Mark Video button to refresh the preview. A black image after
refreshing indicates that the marked screen area cannot be recorded. This
situation may occur when Background mode is used with some versions of
Internet Explorer.
·
The Detach button can
be used to provide a “Picture in Picture” replica of the marked video. This
feature is available when using the Background mode and allows watching a
video while opening other windows which cover the video window.
·
See the added Options under the Settings
Guide below.
Open Replay Video Capture
On Windows 7
and Vista Replay Video Capture sets up your Windows desktop theme to Windows Basic. This is necessary in
order to maximize your computer performance for recording. Your regular
Windows desktop theme is restored when Replay Video Capture closes. This is
not done on Windows 8/10.
Before recording, mark the
video area
First, you
need to mark the recording video area of your screen. You can do this in
two ways:
·
Automatic - using the Get Video button. This works with
motion videos only. Replay Video Capture has motion detection capabilities
and so it can detect the motion area of your screen (a motion video for
example). Play your video, then click the Get Video button. A
semi-transparent window is overlapped onto the video area. You can move or
resize this window if you need to fine tune the marked area.
·
Manual - using the Mark Video Window button. When you
click this button a semi-transparent window is displayed on the screen.
Move and resize this window to mark the recording area.
Begin recording
Stop
playing the video, click the Record
button to begin recording and restart your video. The video is now recorded
and a small Preview window is shown on Replay Video Capture main screen
showing what is recorded.
Stop recording
(manual, time-out, size-out)
·
Once the recording begins the Record button turns to Stop and the Play
button turns to Pause. You can
click Stop or Pause to Stop/Pause recording.
·
You can setup a Recording Time or a Recording File
Size in Settings. Recording stops when either one of these values is
reached.
Playback
recording
To
play the last recording click Play.
To open the storage folder and see all your recording
click the View button.
Note that when
using the Regular screen recording mode you cannot open other windows which
cover the video window on your screen while recording.
The
Background mode is particularly useful in the following situations:
· on Windows 8/10 considerable higher frame rates
can be obtained and larger video windows can be recorded (see the Video
Format table above)
·
on all Windows versions you can use the screen to run other programs
while recording without obscuring the recording area
Setup the
Background mode
Click
Settings. In the Settings dialog
click Enable under Background
mode. In the Background dialog that opens you can select a browser or other
program that you like to open while recording from the screen. On Windows
8/10 you can also click the question mark on the main screen then click Switch to Background mode.
Maximize your video
recording settings (Windows 8/10)
Open
Settings and maximize your recording frame rates as shown in the Video
Format table above. When recording High Definition videos, full screen
games and in general larger video windows it is important to use higher
frame rates and higher video bitrates.
Mark the video area
Same as above
Begin recording
Click
the Record button to begin
recording. The marked video is now recorded and a small Preview window
appears on Replay Video Capture main screen showing what is actually
recording. A black, white or a still image in the Preview window signifies
that the Background mode could not be setup and Replay Video Capture fails
to record (see Troubleshooting below).
Open another
browser or program while recording
Click
Browser on Replay Video Capture
main screen to open another session of your selected browser or open
another program. The marked,
recording video continues to record even though it may be covered by the
new opened windows. Use the Hide
/ Show buttons to hide or show the recording window.
Stop, Playback
recording
Same as above
Tips for using the
Background mode
·
Background mode is particularly useful when recording large or
full screen windows or when you need to use the screen to do other things while
recording. When recording full screen windows from browsers start recording
after the window is set to full screen. In this way the proper window name
is detected.
·
The recorded video
is all black, all white or shows a still image. Some versions of
Internet Explorer may be doing this in which case you should use a
different browser - Chrome, Firefox,
Opera or WM Browser which is
a reduced version of Internet Explorer installed with Replay Video Capture.
·
The message
"No window selected for Background recording" is displayed. In this case
there may be no visible window except the desktop on the screen. If a
window is present, click the caption (top) bar of the window or restart
Replay Video Capture (don't click the main screen until the recorder is
ready).
·
The window name was
not detected and no message is displayed. This could happen if you switch the
video to full screen while Replay Video Capture is recording. You need to
start playing the full screen video first then click the Record button if
Replay Video Capture main screen is visible or use the Start Record hotkey
to begin recording.
·
The recorded video rectangle is shifted upwards. In some cases the
recorded video rectangle has an offset equal to the size of the taskbar.
You need to move the entire marking rectangle upwards by the same amount.
Use one of the options Move DOWN
or Move UP under
?/Monitor Scaling.
·
Use the Show/Hide
button on Replay Video Capture main screen to Hide or Show the recording
window.
·
Avoid to have multiple
windows opened.
·
Replay Video Capture main screen is not visible in
recording even if it overlaps the recorded video window.
To record full screen motion video open Settings then check the Full
Screen box. We highly recommend using MPEG-2 at bitrates higher than 8000
kbps and the Background mode. When recording in Screen Capture mode use the
hotkey to start/stop/pause recording. It is a good idea to do a short
recording first and check the recording quality (see below why).
Important note: when
using the Background mode start recording after the video window was
maximized to full screen. Switching from normal to full
screen while recording may not work.
Recording full screen videos is necessary when the broadcast
is really, a full screen or Full HD format. Currently most of external
computers monitors are Full HD resolution (1920x1080). For laptops the
usual resolution is 1366x768 however 1080 laptops
are also becoming popular. High Definition broadcasts are 720 or 1080
vertical lines of pixels. A 720 video will fit both the laptops and the
external monitors but there is no reason to record a 720 video on a full
screen 768 or 1080 size. This puts unnecessary burden on the CPU. You
should record full screen videos and movies only if the broadcast is a 1080
format. Otherwise use the 720 format or resize the video to 720. The 720
videos can be recorded at 60p (120i ) fps using
MPEG-2.
Hotkeys
and Hiding modes refer to how Replay Video Capture functions are simulated
by keystrokes and how the main screen is moved away from the recording
area.
Note: when using the Windows Basic theme or the
Background mode Replay Video Capture main screen is transparent to
recording.
Setting up Hotkeys
Click Settings then click Hotkeys on the upper menu to open the Hotkeys dialog.
Here you can setup the hotkeys you like to simulate the Record, Pause,
Mute/Unmute microphone functions. While recording you can use the FPS hotkey to
show the actual frame rate.
Setting up Hide modes
Replay Video Capture main screen can be completely hidden when you check
"Hide
Replay Video Capture window..." or minimized in the taskbar when you check
"Minimize
Replay Video Capture window..." . When selecting the Hide mode you can also select a small "Close" button to be shown on top of full screen
videos. This may be necessary to stop recoding games that disable the
keyboard.
Video Settings
Video Format:
· MPEG-2 is the standard video format used
in all digital TV's, DVD's and Blue Ray. Provides highest quality screen
recordings for movies, videos, games, including full HD (1920x1080). It is
also used to record files that can be burned on DVD's. Recorded file
extension is MPG or DVD.MPG. To playback MPG files use VLC Media Player or
Windows Media Player. Note that some
Windows Media Player versions display MPEG-2 recorded videos at 1/2 the
original size specified for recording.
· Windows Media format is included
in all Windows computers. It is used to record high quality movies, videos,
webinars, documents, Power Point presentations. Recorded file extension is
WMV. To playback use VLC Media Player or Windows Media Player. The recorded
WMV files are smaller than MPEG-2 files however recording WMV format
require higher CPU usage.
· Windows Media Screen is included in all
Windows computers. Used for recording slide shows, documents, Power Point,
webinars. The recorded files are very small when compared with all other video
formats. File extension is WMV. To playback use Windows Media Player.
· MPEG-4 (MP4) is used with
iPhone, iPad, iPod, Android devices or for YouTube submissions. Replay
Video Capture makes MP4 files by recording MPEG-2 files which are
automatically converted to MP4 when recording is finished.
Video / Audio
Bitrate (kbps): the higher the bitrates the better video/audio quality but
the recorded file sizes are higher.
Frames/sec (fps): the higher the
number of frames per second (fps) the better video quality and smoothness
of high motion video recordings. Note that the number of captured frames
per second depends primarily on your computer performance characteristics
(speed, memory, CPU graphics, etc) and cannot always be setup to the
desired value. In order
to achieve high frame rates select the Background mode on Windows 8/10 or Windows Basic mode (Aero disabled) on Windows 7 from
Replay Video Capture Settings. You can select a frame rate from the drop
down list or type a number in the Frame/sec box. The Video Format table
above shows some tested frame rates for different video sizes and different
computer configurations. Chopped video, audio out of sync or
chopped audio are some of the side effects of frame rates too high. While recording Replay Video Capture
displays the message "Frame
Rate too high" on the top status window if the selected rate is
higher than the rate the system can sustain. If this message appears
repeatedly you may need to lower the frame rate and/or the size of the
recorded video.
Set Top Window: makes Replay Video
Capture main screen invisible to recording when Basic Windows mode is used.
With
the second monitor plugged in, open click ? / Monitor select and scaling on the main screen or click Settings then click Select Monitor. Select the monitor
and make sure the marking window does not cover both monitors. Before
switching between the two monitors it may be good to reset the markers.
Click the Reset Markers button
under Settings/Tools/Miscellaneous to bring the markers on the initial
position.
Note
that the primary monitor is always labeled "Monitor 1" and the
second monitor is labeled "Monitor 2".
Monitor scaling
In some
cases your monitor(s) resolution or text size may be scaled up (125%, 150%,
etc). HD displays (1920x1080) are automatically scaled up on many Windows
10 computers. In this case the screen coordinates (mouse coordinates) do
not match the actual windows position on the screen. Replay Video Capture
will automatically rescale the
screen coordinates.
Use ? / Monitor select
and scaling on the main screen to access monitor scaling options. These settings apply to monitors connected as
Extended displays. If your displays are Duplicated you need to provide the
scaling factor.
When using the Background mode and monitors with different
scaling factors you may need to manually enter a scale factor as a
percentage if Replay Video Capture could not automatically detect the
Windwos scaling. This can be 70, 80, 125, 150, etc depending on the
resolution of the two monitors. Sometimes the recorded video appears to be moved up or down in
relation to the marked area when Background mode was used. Use Move UP/Move Down buttons to move up or down the entire marking
window an amount shown in the size box.
Important:
when using the Background
mode you need to restart your computer after changing monitor resolution.
Replay Video Capture will automatically setup
the audio recording when installed. On Windows 7, 8, 10, Vista
the default audio driver is the Sound-Capture driver. You can also use the Virtual-Audio driver however the Pause option is not
available when this driver is used. These audio drivers and other options
can be accessed from Settings / Audio Setup.
Important Note: Make sure your computer audio is NOT
setup on Surround or Quadraphonic sound. Replay Video Capture can only
record stereo, 44100 or 48000 sample rates. See Troubleshooting
instructions if you need to change your audio settings
Recording a microphone or other audio
sources
To
do this open Audio Settings and
uncheck the Sound-Capture Driver and the Virtual Audio Driver checkboxes.
Then open the Audio Recording Sources
dropdown list and select one of the audio sources listed.
If no audio source is displayed make sure they're not disabled. On Windows
7, 8 ,10, Vista
right click the speaker icon on the taskbar then click Recording Devices.
Right click the Sound dialog to show the Disabled and Disconnected devices.
The speaker audio can also be recorded by using your
computer internal recording software usually called "Stereo Mix"
(if available). When using the Sound-Capture driver the recorded audio
volume is setup by Replay Video Capture. You can lower or mute the computer
volume while recording. This is not true when using the Stereo Mix option.
Dual Audio Recording
The Dual
Audio option can be used to record a second audio source in
addition to the speaker sound. In most cases this may be an internal or
external microphone. This feature is only available on Windows 7, 8, 10 and
Vista computers. To enable Dual Audio
recording follow the steps bellow. Your microphone must be setup as Default
Device in Windows Recording devices (right click the speaker icon on the
task bar then click Recording Devices or click Replay Video Capture Tools / Audio recording options / Open Windows Sound to
access Windows audio settings). Here is how to setup Dual Audio Recording:
· In Replay Video
Capture Audio Settings check the
Sound-Capture then the Dual Audio checkboxes.
· When checking the
Dual Audio option a small button "M" is displayed on Replay Video
Capture main screen. This can be used to mute/unmute the microphone.
· In the Audio Sources drop down list that
opens select a microphone source (internal or external).
· Click OK to exit.
The Mute/Unmute
button or the hotkey can be used to mute/unmute the microphone. Muting the
microphone is sometimes necessary in order to avoid the echo feedback
between the speakers and the microphone. When enabling this option a hotkey
can be selected to mute/unmute the microphone and a small button
"M" is shown on the main screen. In order to enable the
mute/unmute option the microphone should be set as the Default Device in
Windows Recording Devices dialog. Click Tools / Audio recording options
/ Open Windows Sound to access Windows audio settings.
Recording your speakers on Windows XP
The
default audio recording software is the Stereo Mix if your sound card provides this feature. Replay Video
Capture will try to automatically find this software. To do this uncheck the Sound-Capture and the Virtual Audio
checkboxes. Then open the Audio Recording Sources
dropdown list and select one of the audio sources
listed. If no audio source can be detected make sure they're not disabled.
In order to find out if Stereo Mix is available if
Replay Video Capture can't find, double click (or right click) the
speaker icon on the taskbar and see if a Recording option is listed under
Options or Properties. In the Recording dialog check the "Stereo
Mix", "Wave Out", "What you Hear", "Master
Volume" "Rec. Playback" options if available. The Audio
Setup can also find your audio recording sources and setup them up. If
you'd like to record audio from the microphone or line in, open
the Audio
Recording Sources dropdown list
and select
the audio device.
Settings Guide
The Help dialog (question mark
icon on main screen):
·
Switch to Background mode: Use this tab to quickly
switch between Background mode and Screen Capture mode.
·
Restore initial settings: Restore all
settings to their initial value at the time Replay Video Capture was first
installed on your computer.
·
Restore initial settings: Restore all
settings to their initial value at the time Replay Video Capture was first
installed on your computer.
·
Monitor scaling: Manual setup of
the scaling (zoom) factor of the prime and second montor.
·
Check recording: It is a good idea
to check recording before you actually record a show until you get familiar
with the settings and recording modes provided by Replay Video Capture.
When you use this option there is only on file recorded called _TEST_
regardless how many times you repeat the test.
·
Main screen size: You can toggle
between a smaller and a larger Replay Video Capture interface window.
·
Enable thumb drive mode: Enable Replay
Video Capture to run from an external drive.
The Settings dialog
Tools (top menu)
Video Options (version 8.4 or higher)
·
Disable rescale at startup: disable/enable rescaling Replay Video Capture
main screen at startup
·
Show video preview: disable/enable t6he real time video preview
·
Check monitors at startup: disable/enable Replay Video Capture attempt to automatically
determine the scaling factor of the second monitor when using the
Background mode (Windows 8.1 or 10)
·
Reset markers: resets the screen marking window to its initial
coordinates
· Reposition browser
windows: disable/enable
resetting position of maximized browser windows when searching for motion
videos
Audio Options(top menu)
·
Enable Disable audio bar graph: disable/enable the audio volume displays (bar
graphs)
·
Test speakers (Windows 7): check if the computer audio is stereo with 44100
or 48000 sample rate
·
Open Windows Sound: opens the Windows 7 sound dialog
· Setup
Storage Folder: Choose the folder on your PC where recorded files are to be
saved.
·
Setup video detect mode: Use this option to setup video
window detection mode (using the Get Video / Mark Video Window buttons and
the semi-transparent marking window) or the two markers used in previous
versions.
·
Setup Windows theme: Use this option to setup the
desktop theme for Windows 7 computers (use Windows Basic theme to increase
the performance of your computer).
·
Hide/Minimize Replay Video
Capture:
Opens the Hide Mode dialog. This is useful to setup hotkeys and hide modes
for recording full-screen videos or games for example.
·
Scheduler: Opens the Scheduler. For
instructions to use the Scheduler click the Scheduler tab then click Help in the Scheduler dialog.
·
Keep Alive: use this option to prevent
computer to go to Sleep or prevent screen savers to open while recording.
·
Installed Video Codecs: you can select an already
installed codec from your computer (not installed by Replay Video Capture).
·
WM Browser: this is a reduced version of Internet
Explorer which can be used instead when videos played by Internet Explorer
cannot be screen captured.
·
Miscellaneous/Reinstall Replay
Video Capture codecs: use this option to reinstall Replay Video Capture DirectX
components.
·
Miscellaneous / Video Acceleration: Use this option if you record
Windows Media Player or Real Player windows on Windows XP. Otherwise keep
this option unchecked.
·
Miscellaneous/My
registration:
Use this option to check your current registration information.
Recommended Settings (top menu): configure the
Audio Settings and Video Settings for the desired output quality and the
speed of your PC.
Video Capture Options(top menu):
·
Enhanced video mode includes enhanced recording features
like dual monitor, pause, video preview.
·
Basic video is provided for
compatibility with previous versions of Replay Video Capture.
·
Video Preview – when this check button is
checked, a small video window on the main screen shows what is being
recorded
·
Resize video option can be used
to resize the recorded video and is available only with MPEG-2 video
format. Please note that not every width/height combination is accepted.
·
Set Markers option can be used
to fix the recording area to a certain width and height.
Audio Settings: Set the Audio Bitrate for the recorded
audio. In general, 128 Kbps is fine for most recording, but higher bit
rates are better, especially when music is involved. Click Audio Setup to manually set the
audio driver to be used for recording as well as the dual audio recording
(if necessary).
Video Settings: Choose the Video Bit Rate, Frames per
second, and Video Format.
The Recommended Settings
button will do this for you, but you can manually adjust these parameters
here if you like.
Recording Options:
- Record
Audio:
Turn on or off audio recording. This is useful for making "silent
movies".
- Record
Video:
Turn this option off if you want to make Replay Video Capture into an audio-only
recorder.
- Set
Top Window: This lets you set the recording window on top of other
windows and makes it invisible to recording when Windows Basic theme
is used..
Recording File Size / Time: This lets you
limit the time or file size for your recordings. Handy for unattended
recordings.
Marked screen region not detected
Marked
coordinates are out of the current monitor area. Maybe a second monitor is
used but is turned off. Disconnect the second monitor, select Monitor #1 in
Settings and reset the screen coordinates (under Settings, Tools,
Miscellaneous).
Recorded video does not cover the entire
marked area
See
Monitor scaling section above.
Video quality is choppy
To
get the best quality video - especially on slower machines - try the
following:
1. Go to Settings, and make sure you are
using the MPEG-2 video format.
2. On Vista and Windows 7 use Windows Basic theme, the Background
mode or the “Best Performance” mode instead of “Best Appearance” mode. Windows Basic theme is the default
setting for Replay Video Capture. To change Windows performance mode open
Settings / Tools / Windows Best Performance. On Windows 8, try to use the Background mode.
3. Try recording from
a smaller video window by resizing your video to about 1/3 of your screen
(usually 640x480 or 1280x720 pixels) instead of using the full screen. In
most cases this won't affect the video quality (since the original videos
are scaled UP from smaller sizes to fit a full-screen picture). This
requires less computer power to capture, which will make for smoother
videos.
4. Use a lower frame
rate. For example 20 fps or even 15 fps.
I'm having trouble recording
audio (see Settings / Help / Audio Troubleshoot).
The recorded video is all black or white
This
occurs when a media player or a browser uses exclusively GPU (overlay)
playback. Some versions of Internet Explorer may be doing this in which
case you should use a different browser - Chrome, Firefox, Opera or WM
Browser which is a reduced version of Internet Explorer installed with
Replay Video Capture.
If this happens while recording a DVD use
a DVD player that plays DVD without using hardware acceleration (for
example VLC Media Player with disabled hardware acceleration).
On Windows XP you can disable "hardware
acceleration" on your PC. Here's how to do it:
1. Right click on your
Windows desktop.
2. Select Properties in the pop-up menu.
3. In the Display
Property window click Settings,
Advanced, Troubleshoot.
4. Move the Hardware
Acceleration slider to NONE.
5. Click Apply.
6. Click OK in the message box displayed
by the video card.
7. Click OK to exit
I can't play MPEG-2 files created by
Replay Video Capture
Some
older versions of Windows Media Player cannot playback MPEG-2 files.
In this case use the VLC media player.
MPEG-2 video sizes are half the recorded
size when played with Windows Media Player
This happens when MPEG-2 files are played with some versions
of Windows Media Player. Use a different media player (VLC for
example).
I'm not able to play DVD's any more since
installing Replay Video Capture (some XP computers).
On
XP computers Replay Video Capture disables the video acceleration for
Windows Media Player when installed. This is required for capturing the
screen section where Windows Media plays the video. Otherwise, the
recording shows a black window. This feature can be activated or
deactivated in Replay Video Capture's settings "Disable Video
Acceleration" check box.
Here how to re-enable video acceleration in Windows
Media Player (Windows XP):
1. Open Windows Media
Player.
2. From the menu., select Tools,
Options, Performance.
3. Move the
"Video Acceleration" slider to Full and click OK.
I get a "Cannot Run Graph” error
message
This
error can also indicate a failure to setup recording. Some of the reasons
this error occurs are listed below
·
audio recording cannot
be setup when different programs try to take exclusive control of the audio
device. In Windows 7/8/10 Sound
dialog open the Advanced tab and disable the
Exclusive Control.
·
an audio source (like a microphone or Stereo Mix) is
disabled
·
video window size is too big or the video window
extends on more than one monitor
·
DirectX failure. You need to have DirectX version 9 or
higher installed in order to run Replay Video Capture. In order to find out
what DirectX version you have click the Start button, type dxdiag in the Search box the hit
ENTER. You can update your DirectX from Microsoft's site here.
Try to run Replay Video Capture again.
I get a “Cannot install ... filter” error
This
error indicates that the screen capture codec was not installed in your
computer. In some rare instances this may be the result of very restrictive
security software not allowing activeX components in your system. However
this problem can also occur on some custom Windows installation (especially
Windows 7). Make sure the file regsvr32
located in the folder C:\Windows\SysWOW64 and the regsvr32 file located in C:\Windows\System32 have the same
version.
I get “Recording error (x013). Replay Video Capture will close
now”
This error indicates that recording could not be started in
less than 20 seconds for an unspecified reason. Most of the time this occurrence
shows that your system cannot handle the specified frame rate and/or the
size of the recorded video window. Lower the frame and/or the size of your
video. Also, disconnect the second monitor and use Windows Media video
format.
|